
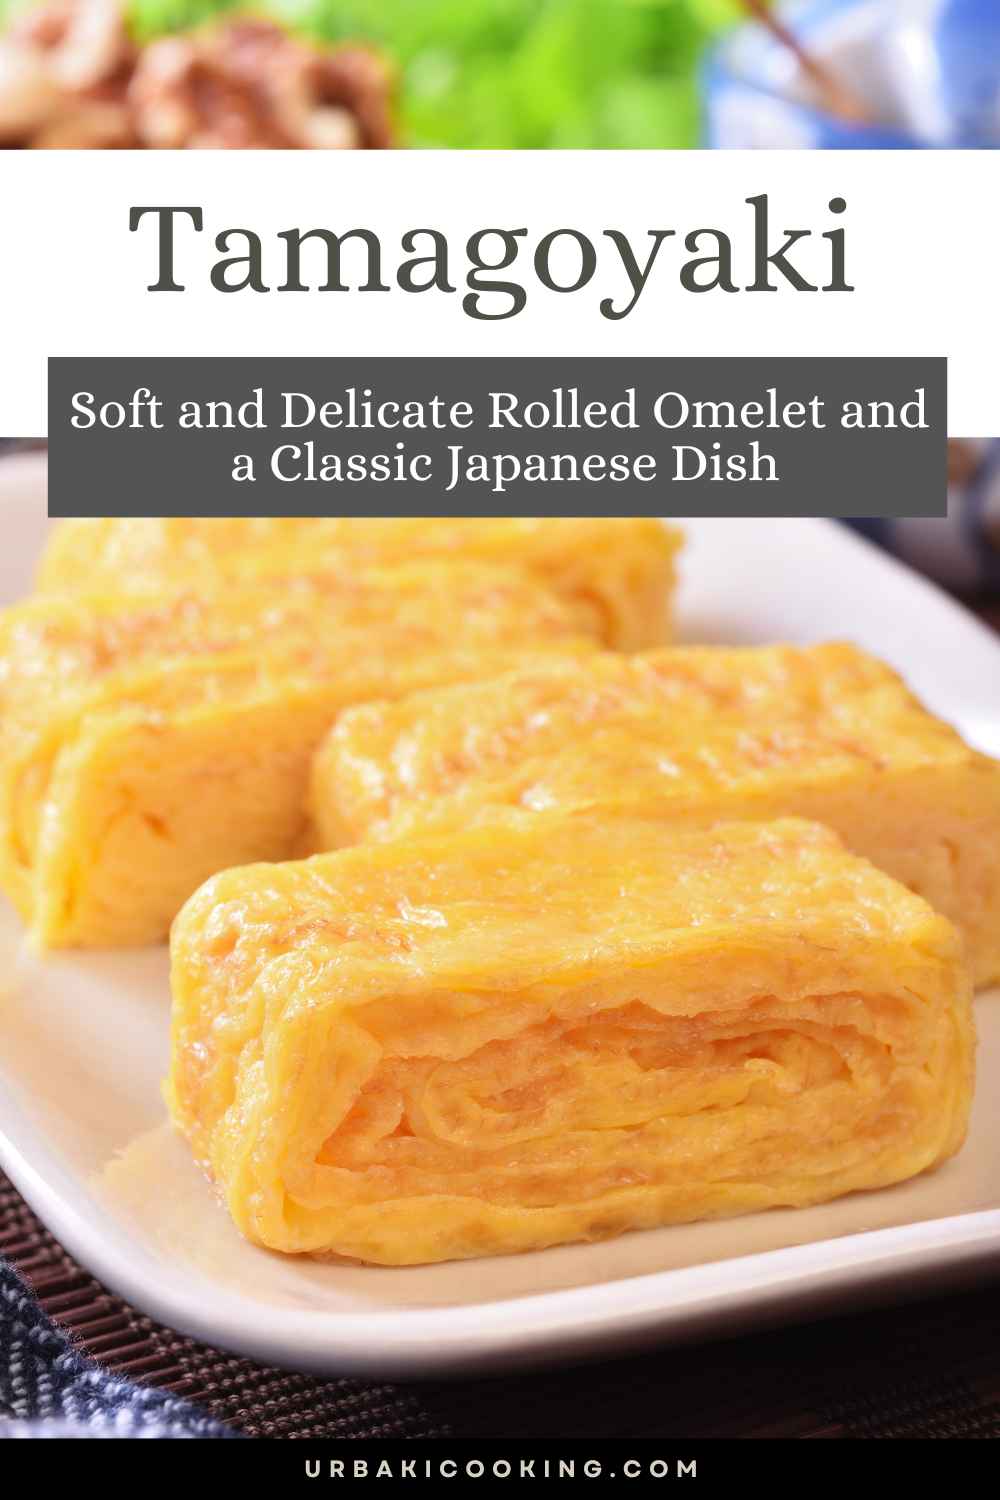
Tamagoyaki: Soft and Delicate Rolled Omelet and a Classic Japanese Dish
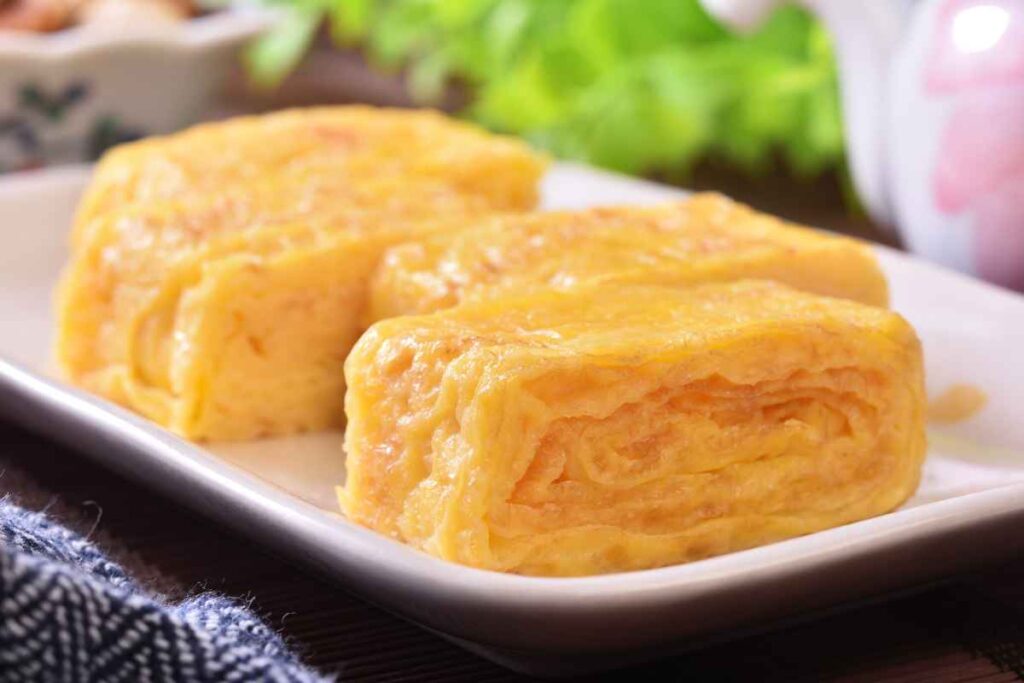
Tamagoyaki, also known as Japanese rolled omelet, is a beloved dish that holds a special place in Japanese cuisine.
Whether you're enjoying it in a sushi restaurant or preparing it at home, tamagoyaki offers a delightful blend of sweet and savory flavors wrapped in layers of tender, fluffy eggs.
But what makes this dish truly special is its preparation method — a delicate process that transforms a simple omelet into a beautifully crafted work of culinary art.
If you’ve ever wanted to make tamagoyaki at home, you're in the right place. This guide will walk you through everything you need to know to create the perfect soft, delicate tamagoyaki from scratch.
What is Tamagoyaki?
Tamagoyaki is more than just an omelet. It is a classic Japanese dish that combines eggs, dashi (a Japanese soup stock), and a touch of sweetness to create a dish that’s both savory and slightly sweet.
This rolled omelet is cooked in layers, with each layer carefully rolled to form a rectangular shape. The result is a fluffy, light texture that melts in your mouth with each bite.
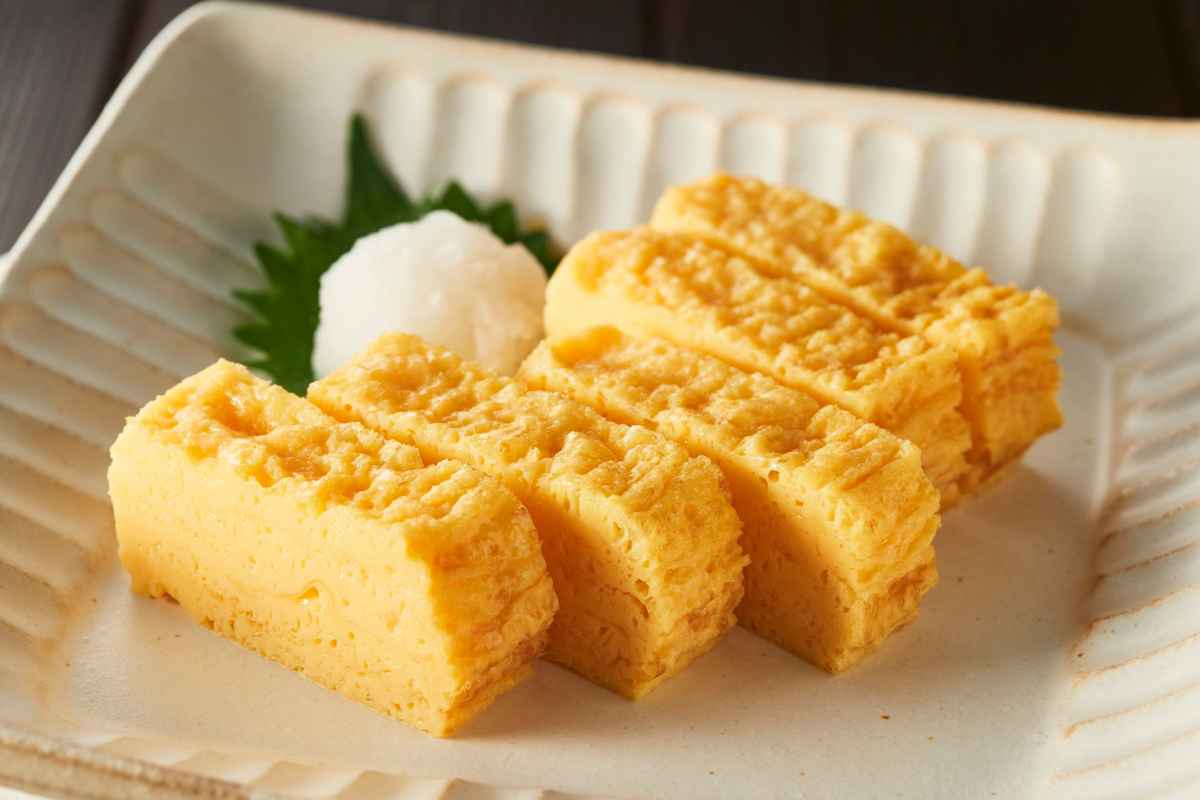
In Japan, tamagoyaki is often served as part of a sushi platter, a bento box, or as a side dish in traditional Japanese breakfasts. It’s also a popular snack enjoyed by people of all ages.
Ingredients
To make authentic tamagoyaki, you’ll need a few simple ingredients, most of which you may already have in your kitchen. Here’s what you’ll need:
- Eggs: Fresh eggs are the star of the dish, so use high-quality eggs for the best flavor and texture.
- Dashi: This is the key ingredient that gives tamagoyaki its unique umami flavor. While instant dashi (Hondashi) is convenient, making your own dashi from kombu (dried seaweed) and bonito flakes adds a deeper, more authentic flavor.
- Soy Sauce: A splash of soy sauce brings out the savory notes of the dish.
- Sugar: A small amount of sugar adds a touch of sweetness, balancing the savory soy sauce.
- Mirin: This sweet rice wine helps to enhance the flavor and create the glossy finish that makes tamagoyaki so appealing.
Tools You’ll Need
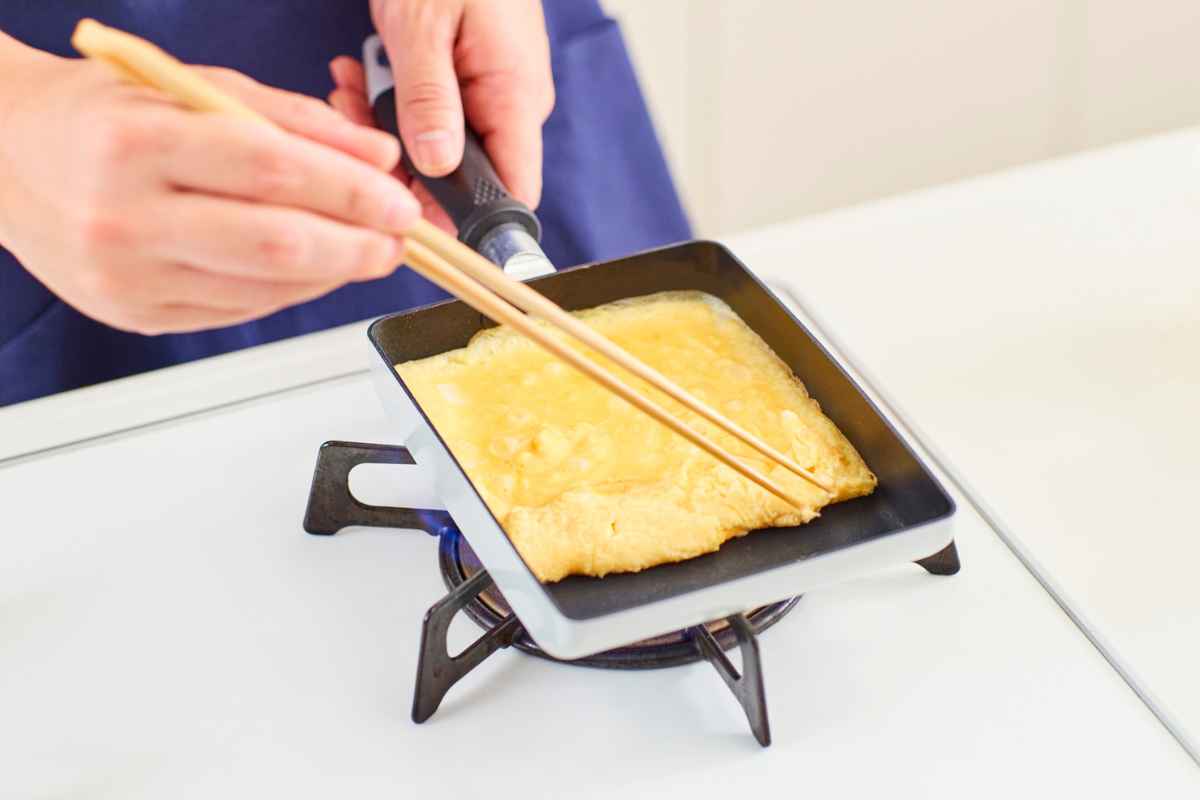
To achieve the perfect rolled tamagoyaki, a rectangular tamagoyaki pan (also known as an omelet pan) is ideal. Its unique shape allows you to roll the omelet easily as it cooks.
However, if you don’t have one, you can use a regular round frying pan, just be sure to adjust the technique a bit to accommodate the shape.
Step-by-Step Guide to Make It
Making tamagoyaki may seem like an intricate process, but with a bit of practice, you’ll be able to create this dish with ease. Here’s how to make the perfect tamagoyaki at home:
Step 1: Prepare the Tamagoyaki Mixture
Crack the eggs into a bowl and beat them gently. Add the dashi, soy sauce, sugar, and mirin, and whisk until the mixture is smooth. The key here is to create a balance between savory and sweet, so feel free to adjust the soy sauce or sugar to suit your taste.
Step 2: Heat the Pan
Place your tamagoyaki pan on medium heat and lightly grease it with oil. A brush or paper towel works well for this. Once the pan is heated, reduce the heat to medium-low to ensure the eggs cook gently without browning.
Step 3: Cook the First Layer
Pour a small amount of the egg mixture into the pan, just enough to cover the bottom. Tilt the pan to spread the egg evenly. Once the edges start to set, use chopsticks or a spatula to gently roll the egg toward you.
Be careful not to let it brown — the goal is to keep the tamagoyaki soft and delicate.
Step 4: Add More Layers
Once the first layer is rolled up, push it to the back of the pan. Then, grease the pan again and pour another small amount of egg mixture into the pan. Lift the rolled omelet and allow the new egg mixture to flow underneath it.
Once it begins to set, roll the omelet again, incorporating the new layer. Repeat this process until all the egg mixture is used.
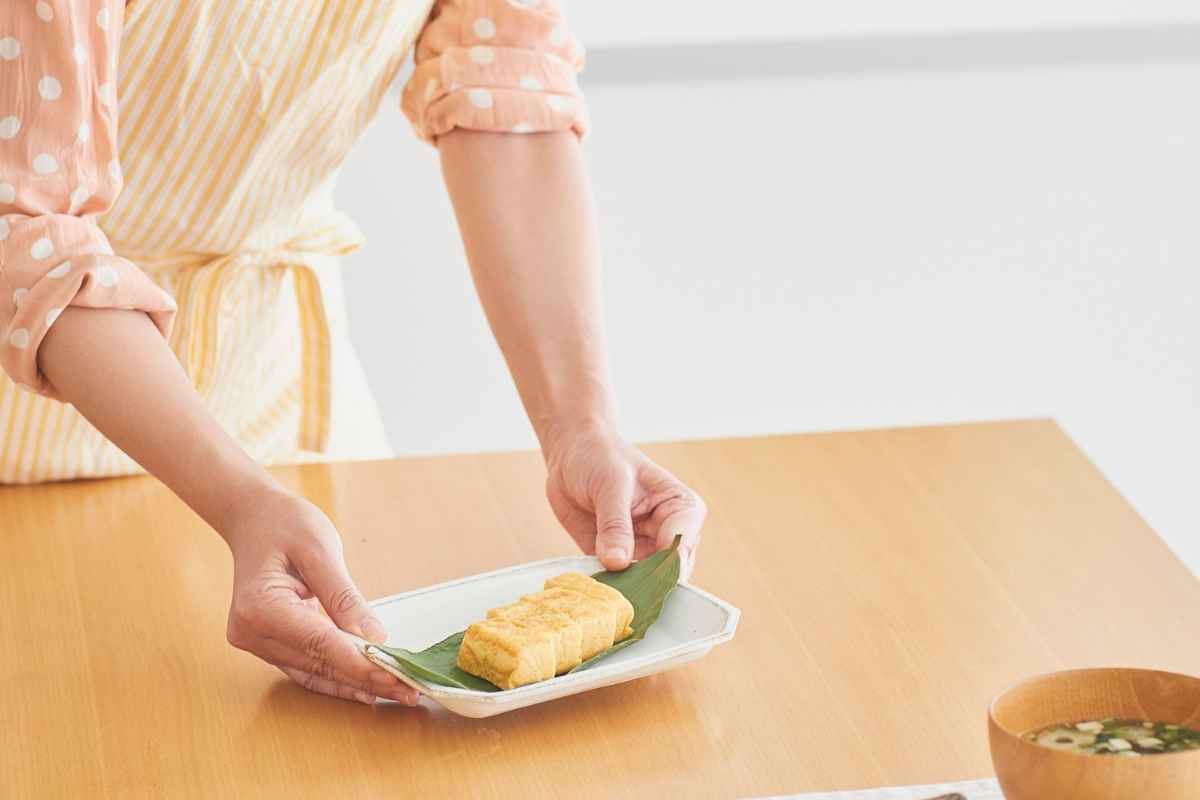
Step 5: Shape and Serve
Once the tamagoyaki is fully rolled, remove it from the pan and let it cool for a few minutes. Use a bamboo sushi mat to help shape the omelet into a neat rectangular shape.
Slice the tamagoyaki into bite-sized pieces, and serve with a side of steamed rice or as part of a bento box.
Aquí tienes un H2 extra, detallado y amplio, para enriquecer aún más el artículo:
Techniques and Secrets for a Fluffy, Layered Omelet
Making tamagoyaki is more than just a cooking process—it's a form of culinary art. The gentle rolling technique, the delicate balance of flavors, and the careful attention to heat all play a role in achieving the perfect tamagoyaki.
Here, we’ll explore some of the secrets behind making this fluffy Japanese omelet truly exceptional.
The Right Temperature is Key
One of the most important techniques in tamagoyaki preparation is maintaining the right temperature. If the heat is too high, the egg will cook too quickly and become dry or rubbery, ruining the signature soft texture of tamagoyaki.
On the other hand, cooking at too low a heat may result in uneven cooking, causing layers to stick or not cook through properly. Patience is essential. Cook each layer slowly, allowing it to set before rolling, for a perfect fluffy texture.
The Importance of Consistency in the Egg Mixture
The consistency of the egg mixture is another crucial factor. For an ideal tamagoyaki, the eggs should be well-beaten, but not frothy. You want a smooth texture that holds together when cooked but remains soft and airy.
Adding dashi, soy sauce, and sugar in the right proportion enhances the flavor and gives the omelet its characteristic lightness.
Rolling with Precision
The key to the perfect tamagoyaki is rolling with precision and care. Using chopsticks or a flat spatula, you’ll need to roll each layer tightly yet gently. The goal is to create smooth, even layers that form a perfectly rolled omelet.
With each roll, the omelet should become firmer, but still maintain that light, delicate texture.

Shaping and Cutting the Omelet
Once your tamagoyaki is rolled, you can shape it with a bamboo sushi mat or by hand to ensure it holds its rectangular form. The cutting process is just as important as the rolling, as tamagoyaki is typically sliced into thick, bite-sized pieces.
A clean, sharp knife ensures that each piece remains intact and beautifully shaped.
Experiment with Additional Flavors
While traditional tamagoyaki is delicious on its own, don’t be afraid to experiment with additional flavors. Some variations may include adding a bit of spinach, seaweed, or even a dash of mirin for an extra layer of sweetness.
These simple additions can elevate the dish and give it a personal twist.
More Than Just Breakfast
Tamagoyaki is not only delicious but also a fun dish to master. The process of making rolled omelet is an enjoyable challenge that allows you to perfect your cooking skills. Plus, it’s versatile enough to be served for breakfast, lunch, or dinner.
Whether you're preparing it for yourself or impressing your friends, tamagoyaki is sure to become a favorite in your cooking repertoire.
Enjoy Watching This Video with a Similar Recipe

Source: Kyodokan ~Japanese culture to the world~
Did you find this post useful or inspiring? Save THIS PIN to your Cooking Board on Pinterest! 😊
Other Recipes You’ll Love 😍