
Strawberry Roses: A Beautiful and Edible Decoration

Strawberry Roses are not only stunning to look at but also delicious to eat.
These elegant edible flowers make the perfect decoration for cakes, desserts, or even as a thoughtful touch for special occasions like Valentine’s Day, Mother’s Day, or weddings. Best of all, they’re surprisingly easy to create with just a few tools and a little practice.
In this article, you’ll learn how to make beautiful strawberry roses step by step, explore creative uses for them, and discover tips to perfect your technique.
Transform Your Kitchen – Discover Essential Cooking Tools and Gadgets!


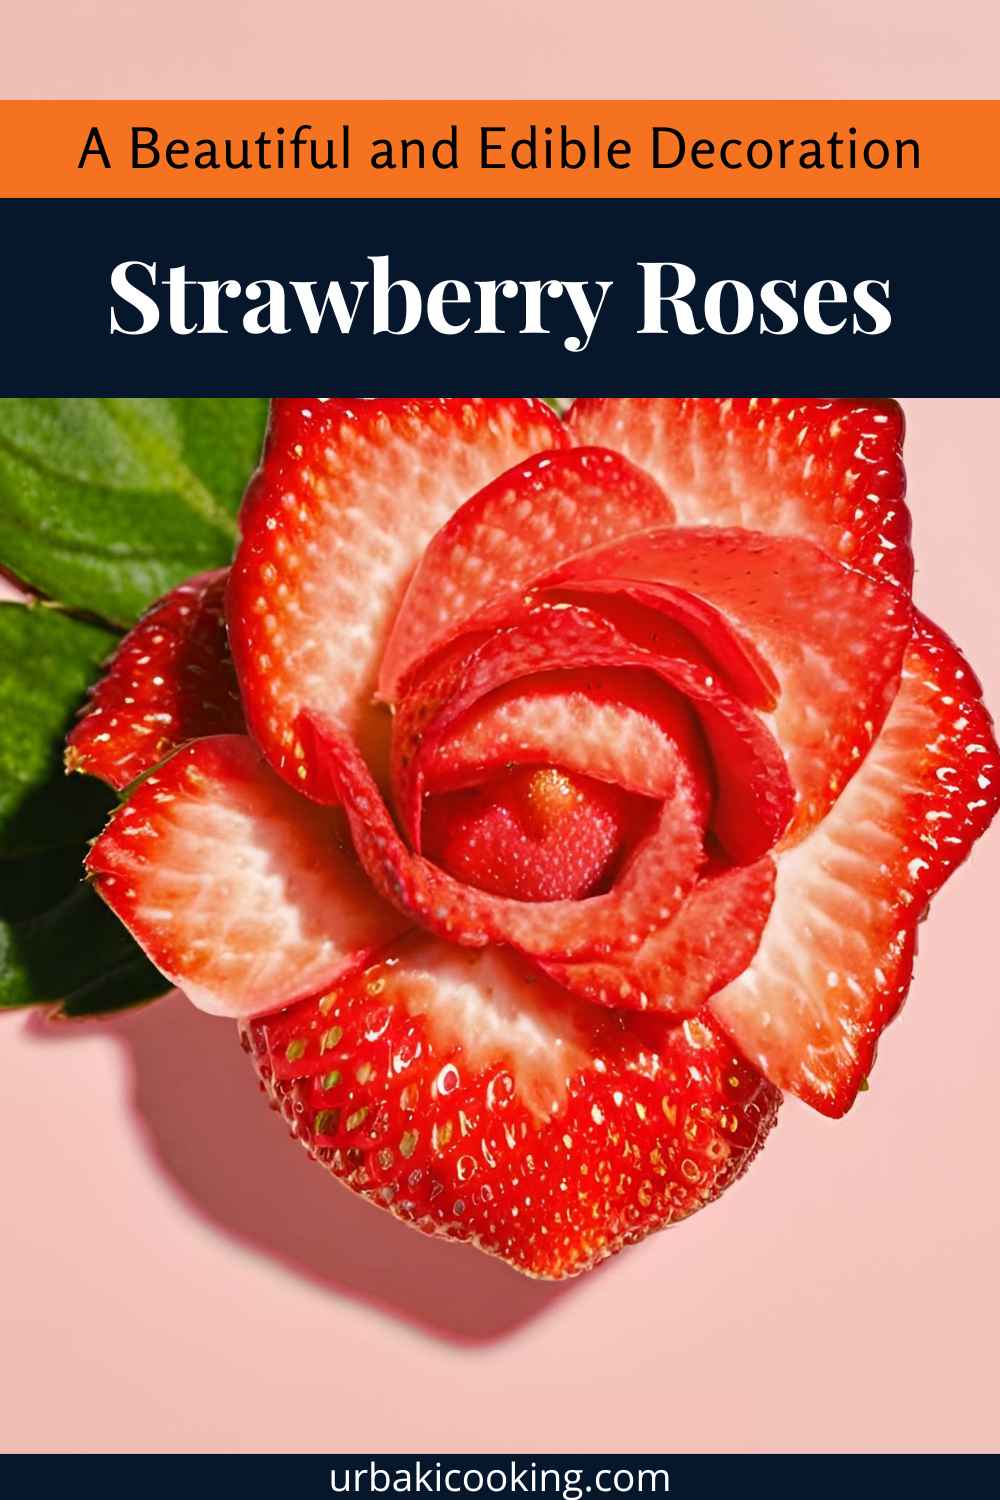
What Are Strawberry Roses?
Strawberry roses are strawberries carved to resemble blooming roses. With a little effort, you can turn a simple fruit into an elegant centerpiece or garnish. The natural red color of strawberries makes them especially striking, and their size and texture are ideal for carving.
Why Make Strawberry Roses?
Strawberry roses are a fantastic choice for various reasons:
- Aesthetic Appeal: They add a touch of elegance to any dish or display.
- Edible Decoration: Unlike inedible flowers, these are fully edible, making them both practical and beautiful.
- Budget-Friendly: With just a few strawberries and basic tools, you can create a professional-looking decoration at home.
- Versatility: Use them to decorate cakes, cupcakes, and cocktails, or serve them as a standalone snack.
Tools and Ingredients You’ll Need
Before you start, gather the following:
- Fresh Strawberries: Choose medium to large strawberries with bright red color and green leaves intact.
- A Sharp Paring Knife: A small, sharp knife is essential for precise cuts.
- Skewers or Toothpicks (Optional): These can help you handle the strawberry while carving.
- Cutting Board: Provides a stable surface for safe carving.

Step-by-Step Instructions to Make Strawberry Roses
1. Choose the Right Strawberries
- Select strawberries that are firm, ripe, and evenly shaped. Soft or overripe strawberries are harder to carve and may fall apart.
- Leave the green tops (calyx) intact, as they help mimic the look of a flower stem.
2. Prepare the Tools
- Wash the strawberries thoroughly and pat them dry with a paper towel.
- Ensure your paring knife is sharp to make clean, precise cuts.
3. Create the Base
- Hold the strawberry by the green leaves or insert it onto a skewer or toothpick for easier handling.
- Position the strawberry so the pointed end faces upward.
4. Carve the Outer Petals
- Starting near the base of the strawberry, make a shallow cut about halfway into the berry. Curve the cut slightly to mimic the shape of a flower petal.
- Gently push the "petal" outward with your knife or finger so it fans out slightly.
- Repeat this process around the base of the strawberry, creating 4-5 evenly spaced petals.
5. Add Inner Petals
- Move to the layer above the outer petals. Create another set of smaller petals, making sure they overlap the first layer.
- Continue carving in a circular pattern, working your way upward.
6. Shape the Center
- When you reach the top of the strawberry, carve small, narrow petals to form the center of the rose.
- For a finishing touch, make a final cut into the tip of the strawberry and fold it slightly outward.

Creative Uses for Strawberry Roses
Once you’ve mastered the technique, there are endless ways to use your strawberry roses:
1. Cake and Cupcake Toppers
Strawberry roses make stunning toppers for cakes and cupcakes. Place a single rose on a cupcake for an elegant touch or arrange several roses in a cluster on a cake for a show-stopping decoration.
2. Fruit Platters
Transform a simple fruit platter into a work of art by adding strawberry roses. Surround them with other fruits like grapes, pineapple, and kiwi for a colorful, edible bouquet.
3. Cocktail Garnishes
Enhance your cocktails with a strawberry rose garnish. Simply place a rose on the rim of a glass or skewer it onto a cocktail pick for an impressive presentation.
4. Chocolate-Dipped Roses
Take your strawberry roses to the next level by dipping them in melted chocolate. Let the chocolate set, and you’ll have a luxurious treat perfect for gifting or serving at parties.
5. Romantic Breakfasts
Add a romantic flair to breakfast dishes like pancakes, waffles, or yogurt bowls by garnishing them with strawberry roses.

Tips for Perfect Strawberry Roses
1. Practice Makes Perfect
Carving strawberry roses may feel tricky at first, but with a little practice, you’ll get the hang of it. Start with a few extra strawberries to refine your technique.
2. Use Fresh, Firm Strawberries
Fresh and firm strawberries hold their shape better during carving. Avoid using overly ripe or mushy strawberries.
3. Be Gentle
When fanning out the petals, handle them gently to avoid breaking them.
4. Keep Your Knife Sharp
A sharp knife makes precise cuts and reduces the risk of tearing the strawberry.
5. Work Quickly
Carve the strawberries close to the time you plan to serve them to keep them fresh and vibrant. If needed, refrigerate the roses until serving.
FAQs
How long do strawberry roses last?
Strawberry roses are best served fresh, but you can refrigerate them for up to 24 hours. Store them in an airtight container to maintain freshness.
Can I use other fruits to make roses?
Yes! You can try carving roses from fruits like apples, mangoes, or even kiwi, though the technique may vary slightly.
What if my strawberry petals break?
Don’t worry—small imperfections add to the charm! You can also use a little melted chocolate to "glue" broken petals back in place.
Why Strawberry Roses Are Worth the Effort
Strawberry roses are more than just a pretty garnish—they’re a way to impress your guests, elevate your dishes, and showcase your creativity. They’re simple to make with practice, and their versatility ensures they’ll be a hit at any event, from romantic dinners to grand celebrations.
Whether you’re decorating a cake, enhancing a cocktail, or creating an edible bouquet, strawberry roses are a delightful addition to any occasion. With just a little effort, you can transform an ordinary strawberry into a stunning, edible work of art.
So grab your knife, practice your carving skills, and get ready to wow your friends and family with these elegant creations!
Enjoy Watching This Video with a Similar Recipe

Source: Sugar Magic by Cristina
Did you find this post useful or inspiring? Save THIS PIN to your Cooking Board on Pinterest!
Other Recipes You’ll Love 😍