
Preserve Summer’s Sweetness: A Complete Guide to Canning Peaches
There’s nothing quite like opening a jar of home-canned peaches in the middle of winter and tasting the sweetness of summer all over again.
Canning your own peaches is not only a rewarding process, but it’s also a great way to preserve fresh fruit without added preservatives.
Whether you're new to canning or a seasoned pro, this guide will walk you through everything you need to know to create perfect canned peach slices at home.
Transform Your Kitchen – Discover Essential Cooking Tools and Gadgets!


Choosing the Right Peaches
Before you start, it’s essential to select the right type of peach. For canning, freestone peaches are the best choice. These varieties allow the pit to be easily removed, which saves time and keeps the slices intact.
Look for peaches that are:
- Fully ripe but firm, not overly soft
- Fragrant and sweet-smelling
- Free of bruises or mold
Clingstone peaches can be used, but you'll need more time to separate the flesh from the pit. Yellow peaches are typically preferred for canning because they hold their color and texture well during the process.

Preparing Your Workspace
Before diving into the canning process, make sure you have a clean and organized workspace. You’ll need:
- A large stockpot or canner with a rack
- Sterilized mason jars with lids and bands
- A jar lifter and canning funnel
- A large bowl for blanching peaches
- A slotted spoon and sharp knife
- Sugar, water, and optional lemon juice
Sterilize your jars by boiling them in water for at least 10 minutes, then keep them warm until ready to use. Clean equipment is crucial to avoid spoilage.
Blanching and Peeling the Peaches
Peeling peaches by hand is tedious, but blanching makes the job easy. Here’s how:
- Boil a large pot of water and prepare a bowl of ice water.
- Cut a small "X" on the bottom of each peach.
- Drop the peaches into the boiling water for 30–60 seconds.
- Quickly transfer them to the ice water using a slotted spoon.
- Once cooled, the skins will slip off easily with your hands or a paring knife.
This step ensures your peach slices are smooth and clean for packing.

Slicing and Preventing Browning
After peeling, cut the peaches in half, remove the pit, and slice them into even wedges. To prevent them from browning while you work, immerse the slices in a bowl of water with lemon juice or ascorbic acid (1 tablespoon of lemon juice per quart of water is enough).
This also adds a mild tartness that balances the sweetness of the syrup you’ll use later.
Making the Syrup
You can preserve peaches in light, medium, or heavy syrup, depending on your taste preference. For a more natural flavor, you can even use fruit juice or plain water.
Here’s a simple ratio for light syrup (makes enough for 4 pint jars):
- 2 cups sugar
- 5 cups water
Heat the sugar and water in a saucepan until the sugar dissolves. Keep it warm on the stove. Warm syrup helps keep the jars at a safe temperature during canning and preserves the peaches’ texture.

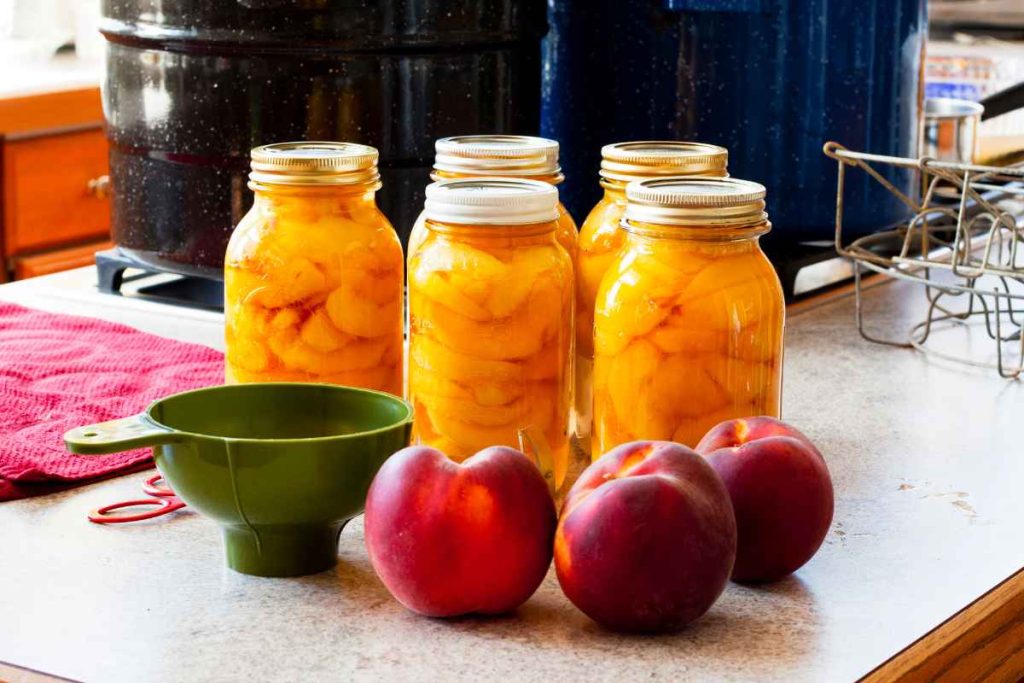
Packing the Jars
Now comes the fun part: filling your jars with peaches.
- Use a canning funnel to help load the peach slices into hot jars.
- Arrange them snugly, but without crushing.
- Ladle the hot syrup over the peaches, leaving ½ inch of headspace at the top.
- Run a non-metallic utensil (like a plastic knife or chopstick) around the inside of the jar to remove air bubbles.
- Wipe the rim with a clean, damp cloth.
- Place the lid and screw the band on until fingertip tight.
Proper packing ensures that the peaches stay submerged in syrup and helps prevent spoilage.
Water Bath Canning
Once the jars are packed and sealed, it’s time to process them in a water bath. This is a key step for safely preserving fruit.
- Place the jars in a canner or large stockpot with a rack.
- Add hot water to cover the jars by at least 1 inch.
- Bring the water to a rolling boil and process:
- 20 minutes for pint jars
- 25 minutes for quart jars
- After processing, turn off the heat and let the jars sit for 5 minutes.
- Carefully remove the jars with a jar lifter and place them on a towel to cool.
Do not retighten lids or disturb the jars. Allow them to cool for 12–24 hours.

Checking the Seal and Storage
Once the jars have cooled, check each one to make sure it sealed properly.
- Press the center of the lid; it should not pop up and down.
- If sealed, the lid will be concave and firmly in place.
- If any jars didn’t seal, refrigerate and use those first.
Label your jars with the date and store them in a cool, dark place. Properly canned peaches can last up to a year or more.
Using Your Canned Peach Slices
Now that you’ve canned your peaches, there are endless ways to enjoy them! These juicy, golden slices are perfect for:
- Topping oatmeal, pancakes, or yogurt
- Filling pies or cobblers
- Adding to smoothies or fruit salads
- Serving over ice cream
- Eating straight from the jar
The texture remains tender yet firm, and the flavor is rich and sweet without being overpowering.
Tips for Success
Here are a few extra tips to help you can peaches like a pro:
- Use ripe but firm peaches to avoid mushy slices.
- Don’t skip the lemon water soak—it helps retain color and flavor.
- Stick to the recommended processing times to ensure safety.
- Consider using wide-mouth jars for easier packing and serving.
- Try canning small batches if you're new, to gain confidence.
Home canning is part science and part art, but once you try it, you’ll wonder why you didn’t start sooner.
A Sweet Reward for Your Effort
There’s something incredibly satisfying about preserving your own food. With just a bit of effort and care, you can stock your pantry with jars of golden peach slices that taste like sunshine.
Whether you’re building a homestead kitchen or just want to enjoy summer flavors all year round, canning peaches is a wonderful tradition worth continuing.
Once you taste your first spoonful, you'll know: homemade always tastes better.
Enjoy Watching This Video with a Similar Recipe

Did you find this post useful or inspiring? Save THIS PIN to your Cooking Board on Pinterest!

Other Recipes You’ll Love 😍