
Baked Ham and Cheese Sliders - Leftover Ham Recipes

If you're staring at a fridge full of leftover ham after a holiday feast or weekend dinner, it's time to get creative. Baked ham and cheese sliders are the perfect way to breathe new life into those slices of ham. They're easy to make, crowd-pleasing, and incredibly satisfying. Whether you're feeding a hungry family or prepping snacks for game day, these sliders will hit the spot.
Why Sliders Are the Ultimate Leftover Hack
Sliders are compact, quick to prep, and endlessly customizable. When you’ve got extra ham, throwing together a batch of baked sliders is a smart, low-effort solution. They’re also a great way to use other leftovers like cheese, sauces, or even bread that’s a day or two old.
These sliders aren’t just convenient; they’re also a comfort food classic. Think gooey melted cheese, savory ham, and buttery rolls baked until golden. It’s hard to beat that.
Discover New Ways to Impress Your Guests – Try These Appetizer & Snack Recipes!


Ingredients You’ll Need
Here’s what goes into making these ham and cheese sliders:
- 12 slider buns (Hawaiian rolls are a favorite for their sweet flavor)
- 2 cups of cooked ham, thinly sliced or chopped
- 6-8 slices of Swiss cheese (or cheddar, provolone, or mozzarella)
- 1/4 cup mayonnaise (optional, for added creaminess)
- 1/4 cup Dijon mustard
- 4 tablespoons butter, melted
- 1 tablespoon poppy seeds (optional)
- 1 tablespoon minced onion
- 1/2 teaspoon garlic powder
- Salt and pepper to taste

Substitution Ideas
- Cheese: Use what you have. Leftover cheese from a charcuterie board? Perfect.
- Bread: Any soft roll or even mini bagels can work.
- Sauce: No mustard? Try ranch or a swipe of pesto.
Step-by-Step Instructions
Step 1: Prep the Oven and Pan
Preheat your oven to 350°F (175°C). Line a 9x13-inch baking dish with parchment paper or lightly grease it.
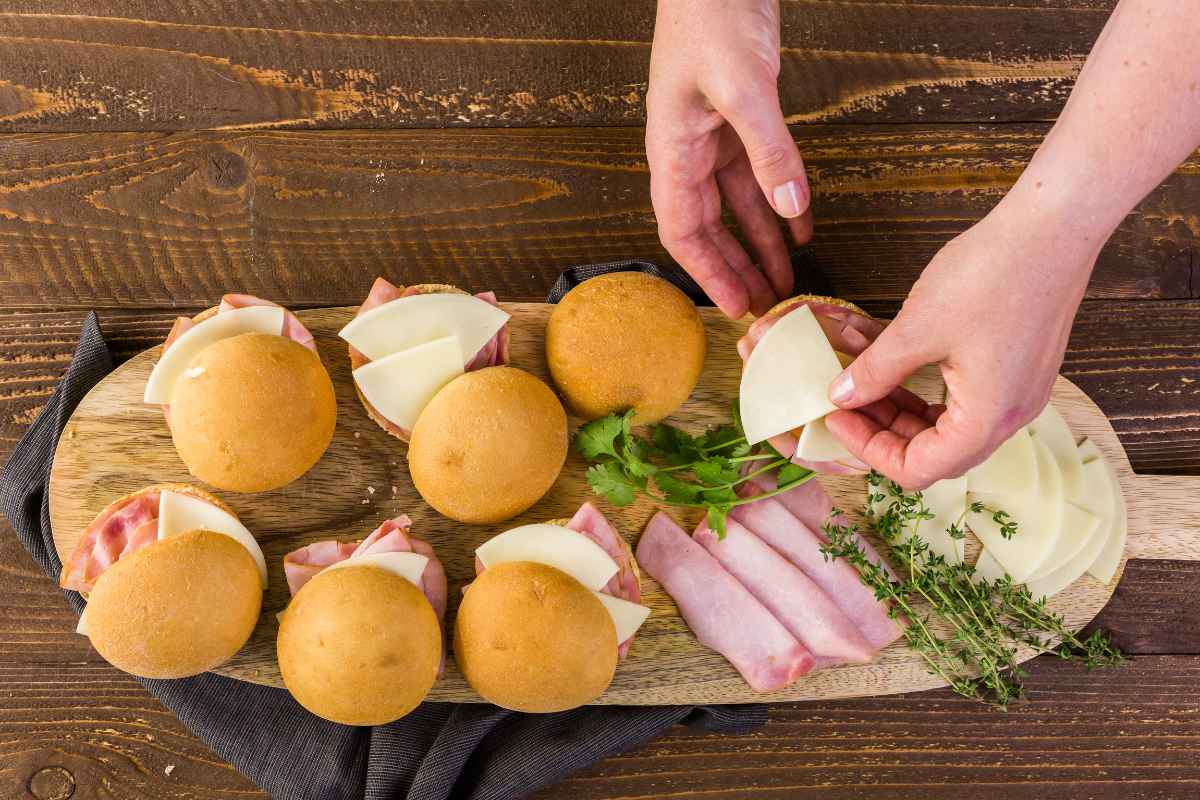
Step 2: Assemble the Sliders
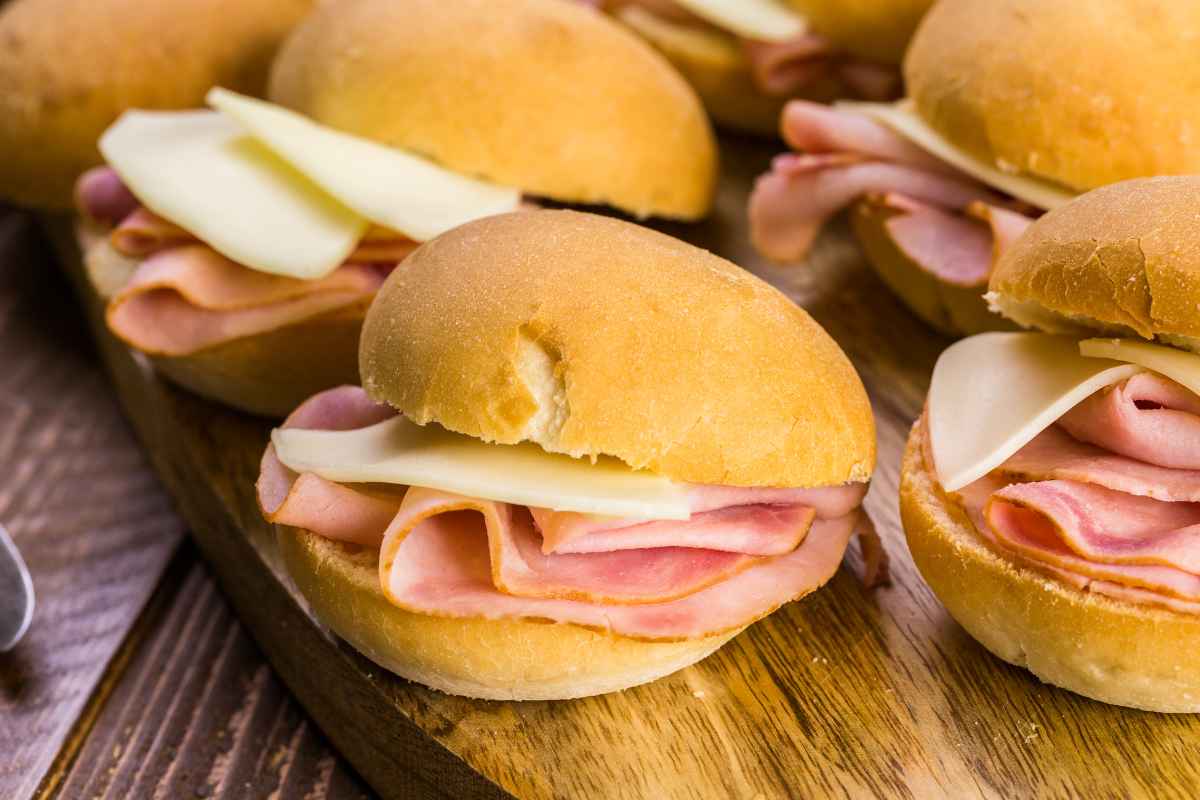
Slice the buns in half horizontally, keeping the bottoms and tops connected. Place the bottom halves in the baking dish.
Spread a thin layer of mayonnaise (if using) and Dijon mustard over the bottom buns. Layer on the sliced ham, then the cheese. Place the top halves of the buns back on.
Step 3: Make the Butter Topping
In a small bowl, mix the melted butter, poppy seeds, minced onion, garlic powder, and a pinch of salt and pepper. Spoon or brush the mixture evenly over the sliders.
Step 4: Bake
Cover the dish with foil and bake for 15 minutes. Remove the foil and bake uncovered for another 5-7 minutes until the tops are golden and the cheese is fully melted.
Step 5: Serve
Let the sliders cool for a couple of minutes, then use a sharp knife or spatula to separate and serve.
Tips for Best Results
- Don’t overfill: Too much ham or cheese can make the sliders soggy.
- Use day-old bread: Slightly stale buns hold up better to the butter topping.
- Press down: Gently press the sliders before baking to compact the layers.
Make It Your Own
These sliders are endlessly adaptable. Here are a few fun twists:
BBQ Ham Sliders
Add a layer of barbecue sauce instead of mustard. Use cheddar cheese for a smoky bite.
Breakfast Sliders
Add a layer of scrambled eggs and swap the mustard for hot sauce or sriracha.
Veggie-Loaded Sliders
Add thin slices of tomato, pickles, or caramelized onions for extra flavor and texture.
Perfect for Any Occasion
Baked ham and cheese sliders are more than just a way to use leftovers. They’re ideal for:
- Potlucks and parties
- Quick weeknight dinners
- Lunchbox meals
- Game day snacks
They're portable, easy to reheat, and guaranteed to disappear fast.
Storing and Reheating
If you somehow end up with leftovers (unlikely!), store them in an airtight container in the fridge for up to 3 days. To reheat, cover with foil and warm in the oven at 325°F until heated through, or microwave in 30-second intervals.
Don't let leftover ham go to waste. With just a few simple ingredients, you can transform it into baked ham and cheese sliders that everyone will love. They’re fast, flavorful, and fun to make. Next time you find yourself with leftover ham, skip the plain sandwich and make sliders instead. You’ll be glad you did.
Enjoy Watching This Video with a Similar Recipe

Source: Ashley . The Recipe Rebel

Other Recipes You’ll Love 😍