
Make Perfect Onigiri Every Time with This Easy Recipe

Few Japanese foods are as simple yet comforting as onigiri—rice balls wrapped in seaweed, often filled with something savory or tangy. They are a staple of bento boxes, train station snacks, and home kitchens, thanks to their portability and versatility.
While they may look like sushi, onigiri are different: they are made with plain salted rice rather than vinegared sushi rice, and they celebrate everyday comfort over formality.
In this guide, you’ll learn the authentic method for shaping onigiri, common filling ideas, storage tips, and fun variations to try at home.
A Quick Look at Onigiri’s History
Onigiri dates back to at least the Heian period (8th–12th century), when rice was shaped into portable bundles for travel and battles. Over centuries, it became an everyday Japanese comfort food.
Today, it’s found everywhere—from homemade lunches to convenience stores—remaining one of Japan’s most beloved snacks.

What Make It Special
Unlike sushi, onigiri doesn’t require vinegar seasoning. Warm Japanese short-grain rice, lightly salted, is the heart of the recipe. The salt is essential—it adds flavor and helps preserve freshness.
Wrapped in nori and filled with anything from pickled plum to grilled salmon, onigiri is the perfect example of how simple ingredients can create something deeply satisfying.
Ingredients You’ll Need
- 2 cups (360 g) Japanese short-grain rice
- 2 ¼ cups (540 ml) water for cooking
- 1 teaspoon salt (plus extra for your hands)
- Nori sheets, cut into strips

- Filling of choice (see suggestions below)
Note: Use Japanese short-grain or sushi rice varieties such as Koshihikari. Medium or long-grain rice won’t stick properly.
Step-by-Step: How to Shape Onigiri
1. Cook the Rice Properly
Rinse the rice several times until the water runs almost clear. Soak for 30 minutes, then cook in a rice cooker or pot. Once cooked, let it steam for 10 minutes. The result should be glossy, slightly sticky rice that holds together.
2. Prepare Your Hands
Mix cold water with a pinch of salt in a bowl. Dip your hands before shaping to prevent sticking and to season the rice. This step is key to traditional onigiri.
3. Shape While the Rice Is Warm
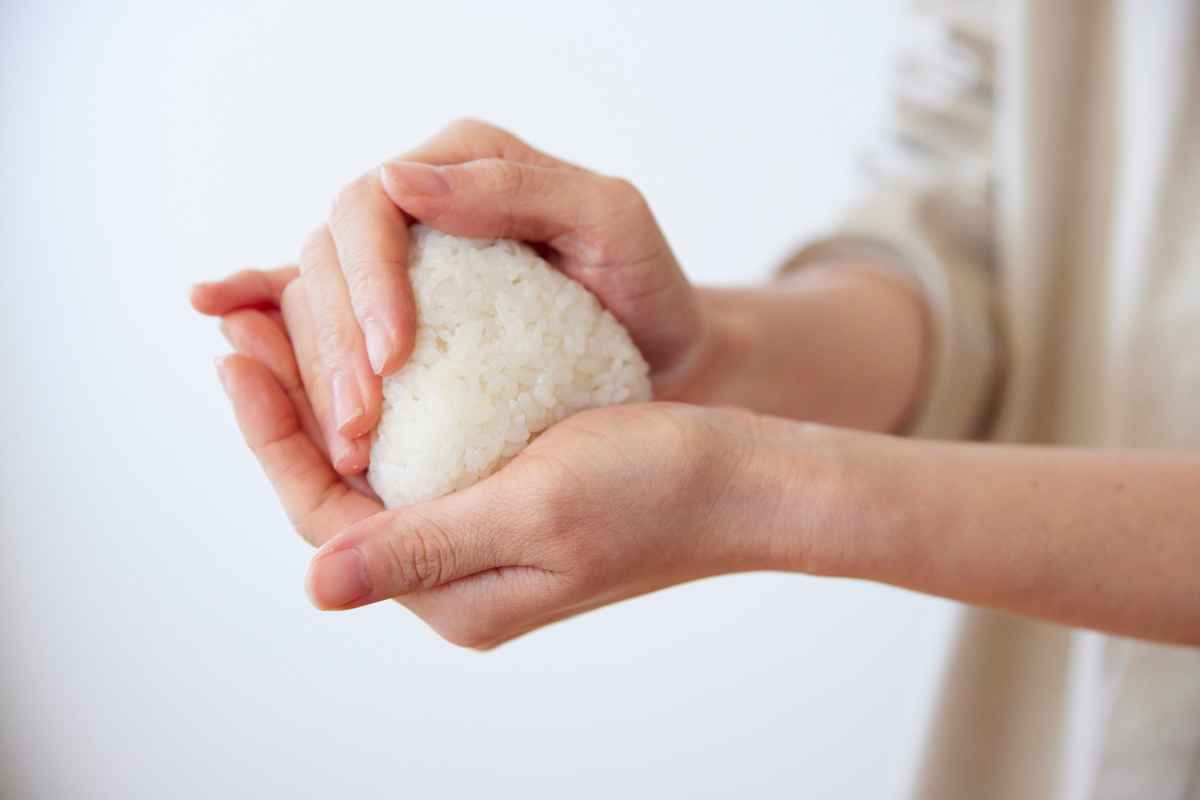
Scoop about ½ cup (90–110 g) of warm rice into your palm. Press gently into a ball or triangle shape, making sure not to squish it—too much pressure makes it dense and hard.
4. Add Fillings
Make a small indentation in the center, add your filling, and cover it with a little more rice. Seal carefully so the filling doesn’t leak out.
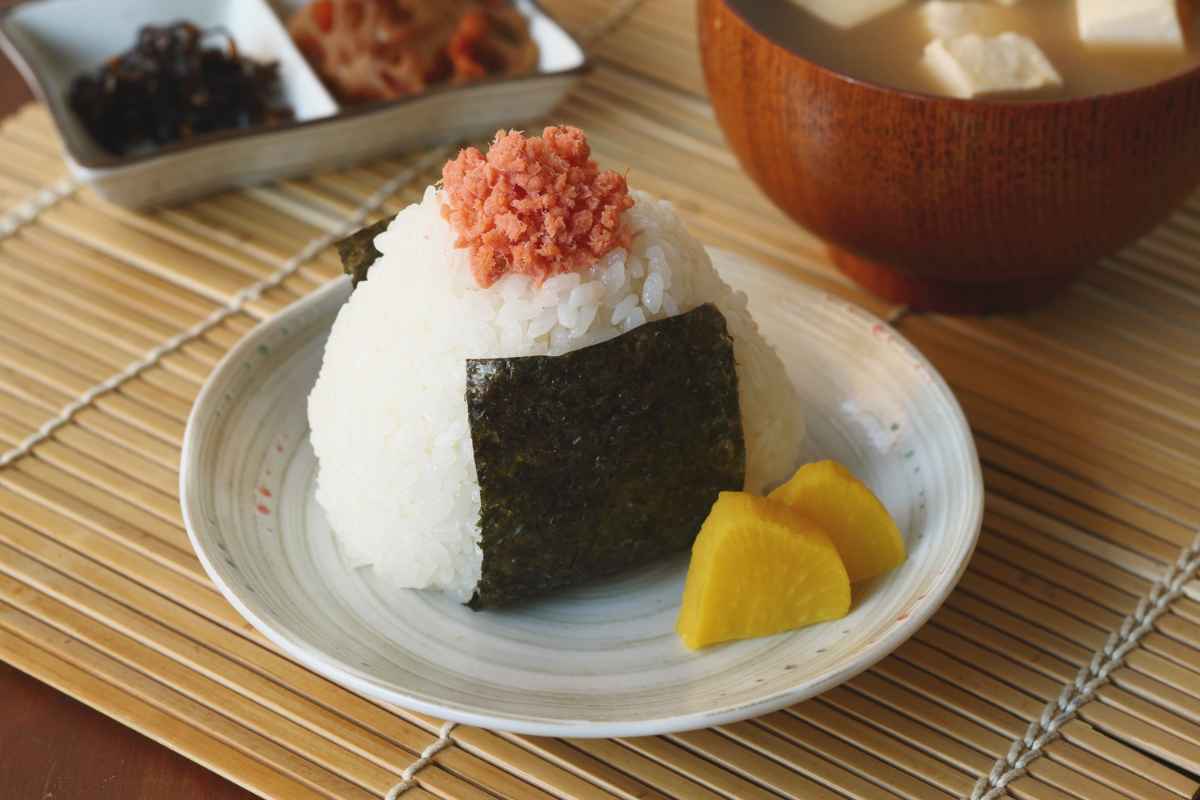
5. Wrap with Nori
Wrap a strip of nori around the base or cover one side. Always add the nori just before eating so it stays crisp.
Popular Fillings
- Umeboshi (pickled plum): Tart and salty, a classic.
- Shiozake (salted salmon): Rich, savory, and traditional.
- Okaka: Bonito flakes mixed with soy sauce.
- Tuna mayo: A modern favorite combining tuna with Japanese mayonnaise.
- Mentaiko: Spicy pollock roe for bold flavor.
These fillings not only add flavor but also help preserve the rice longer.
Fun Variations to Try
Yaki Onigiri (Grilled Rice Balls)
Brush formed rice balls with soy sauce or miso and grill until the outside is golden and crisp. The smoky flavor is irresistible.
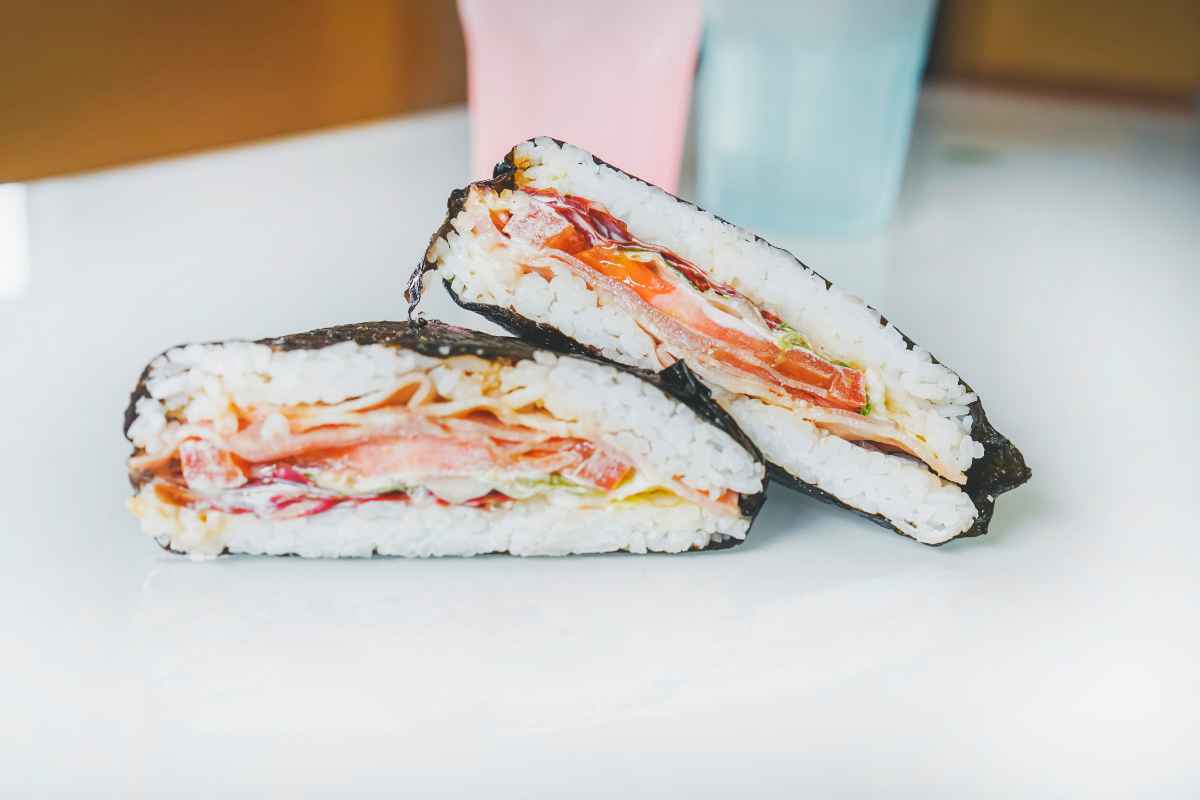
Onigirazu (Rice Sandwich)
A modern twist that layers rice, fillings, and nori into a flat, sandwich-like shape. Great for bigger fillings like tamagoyaki or veggies.
Seasoned Rice or Furikake
Instead of plain rice, mix in sesame seeds, furikake seasoning, or even chopped herbs for extra flavor.
Storing and Food Safety
- Eat fresh: Onigiri is best within a couple of hours at room temperature.
- For later: Store in the fridge for up to 24 hours. While some sources say up to 3–4 days, the texture suffers and fillings like tuna mayo should be eaten sooner.
- Tip: Wrap rice balls in plastic wrap and keep nori separate until ready to eat.
- Freezing: Onigiri can be frozen without nori, then reheated in the microwave.
Important: Always cool rice quickly and refrigerate promptly to avoid bacterial growth.

Troubleshooting Tips
- Rice falls apart: Make sure you’re using the right rice and shaping while warm.
- Too dense: Use a lighter touch when pressing.
- Nori is soggy: Wrap it only right before eating.
Why You’ll Love Making Onigiri
With just rice, salt, and nori, you can create endless variations of Japanese rice balls that work for snacks, picnics, and quick meals. They’re customizable, budget-friendly, and deeply tied to Japanese culture.
Once you’ve made them a few times, you’ll discover how fun it is to experiment with fillings and shapes.
Onigiri is proof that the simplest foods can also be the most comforting.
Enjoy Watching This Video with a Similar Recipe

Source: Yuka in Tokyo
Did you find this post useful or inspiring? Save THIS PIN to your Cooking Board on Pinterest! 😊

Other Recipes You’ll Love 😍